

To request a room in the Whitman School of Management, please CLICK HERE.
To reserve a team room, please CLICK HERE.
[Staff Only] To book a desk in a shared workspace, please CLICK HERE.
Click the "SIGN IN" button at the top of the public calendar page.

Please DO NOT create an account. Instead, click the "SIGN IN USING SYR SSO" button to log in.
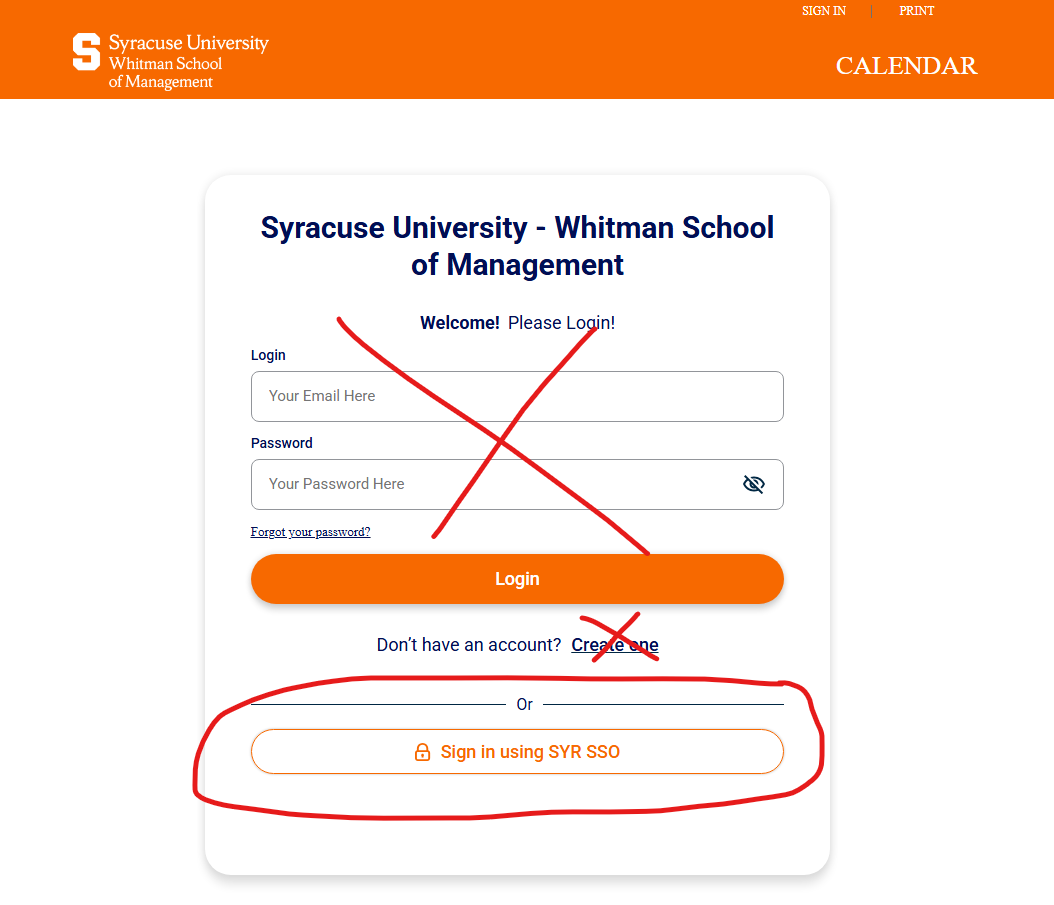
Then click the "MY PROFILE" button.

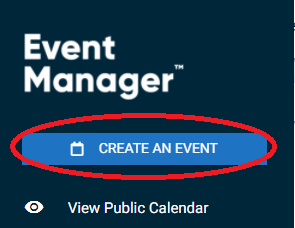
Once you are in the Event Manager application, hover the mouse over the left sidebar and then click the "CREATE AN EVENT" button, and use the guidelines below to fill out the form and create your event.
Please follow the guidelines below. For additional information and instructional videos, please visit THIS LINK.
EVENT NAME: Please enter the full name of your event and do not use acronyms and abbreviations.
SUMMARY: Please enter a clear and concise summary/description of the event that includes the audience for the event, the reason the event is being held, and any other information that clarifies the purpose and intention
of the event.
CONTACT INFORMATION: Please fill out all fields in this area, including your e-mail and phone number, so that you may be contacted for more information if necessary.
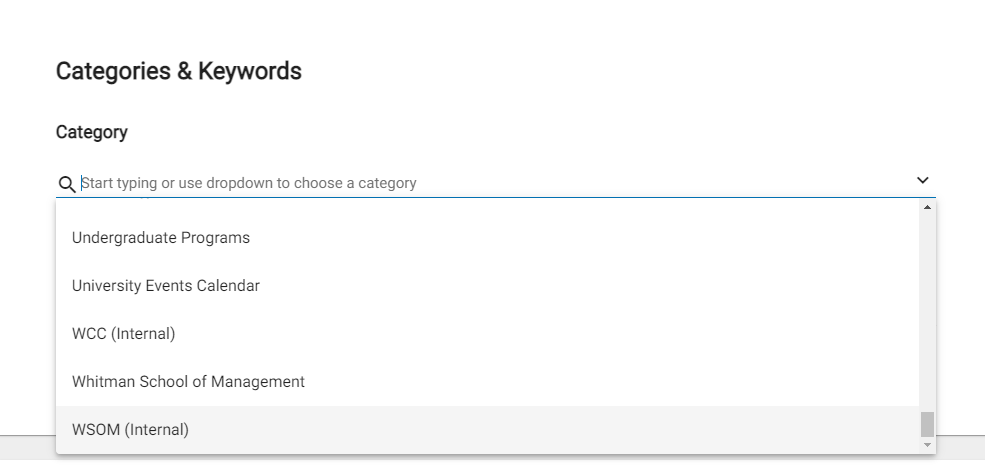
EVENT CATEGORIZATION: Categorizing your event is very important, particularly for the appropriate placement of your event on the website. Please select the category(ies) that is/are appropriate for the event. You can select multiple
categories from the dropdown list. Please do not select all of the categories under any circumstance; only select the category(ies) that are associated with the event.
Please take note of the “Communications” category options that allow you to select your event for marketing on the Welcome to Whitman signage in the Whitman building.
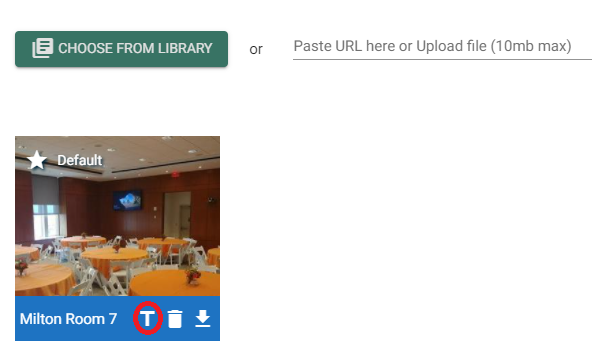
UPLOAD IMAGE: Your event will attract more attention with an image. If you have an image for your event, click "CHOOSE FROM LIBRARY," select your photo, and click "ATTACH." Images cannot exceed 10MB.
IMAGE ALT TEXT: Enter a short description (10 words max) of the photograph by clicking the T below the image, and then click "Save."
ADDITIONAL INFORMATION: Enter any additional information or notes pertaining to this event, such as special event instructions, in the "Additional Information" area. If this event is utilizing an online signup form, please enter the RSVP URL in the field provided.
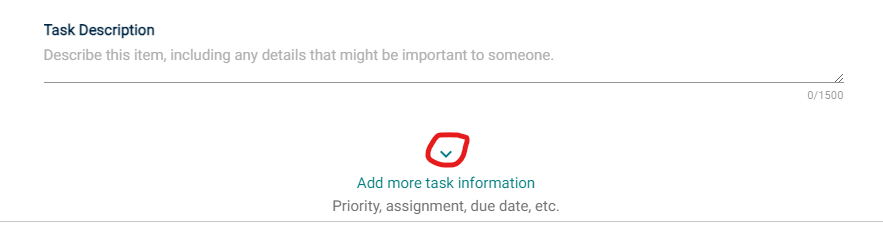
TASKS: Click the "Add A Task" button. A new window will open. In this window, select any additional support that is needed under the Type field, such as IT Support or rearranging furniture. Then continue to fill out the required information for this section. A task description, although not required, will be beneficial in getting you the proper help that you need. Also click the down arrow, shown below, for additional details such as priority, due date, etc. Assignment cannot be changed but will be shown.
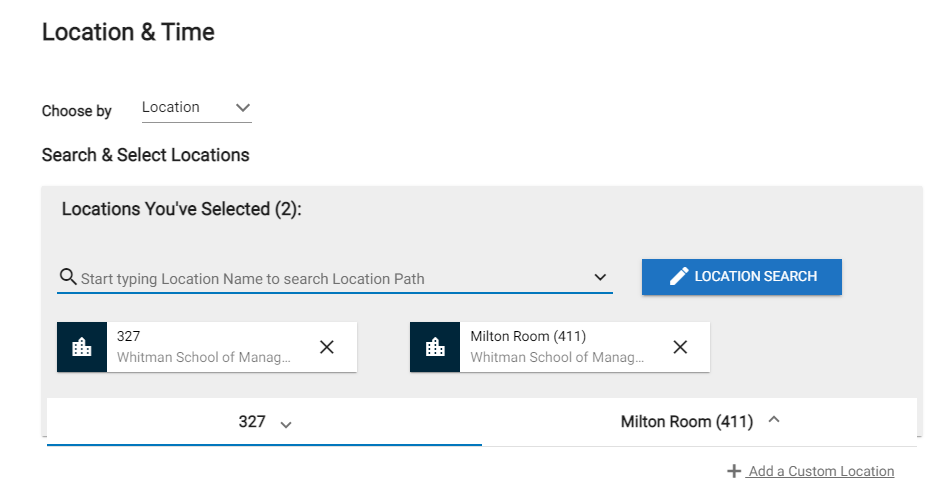
ROOM INFORMATION: You have two options when searching for room availability. You can search for rooms by name or number by opening up the dropdown list and/or typing to search, or you can click on "LOCATION SEARCH,” and search
by room type or other filter criteria. Once you find the room(s) you want, click on the checkbox next to the one(s) you wish to reserve. Then click the "Save" button.
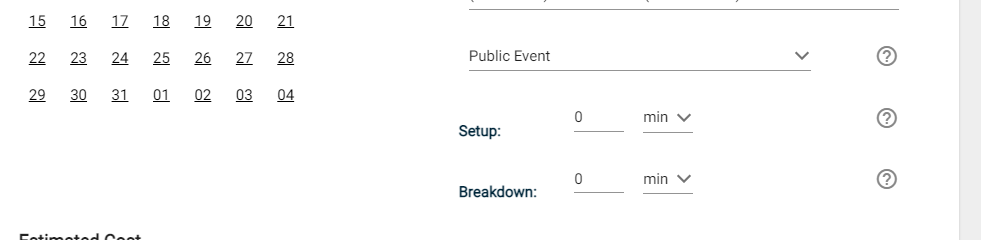
Next, enter the date and time (start and end) of your event. PLEASE NOTE: DO NOT pad these times with set up and break down time. You will have an opportunity to add set up and break down time in a moment. If this event repeats, select "Repeat Weekly."
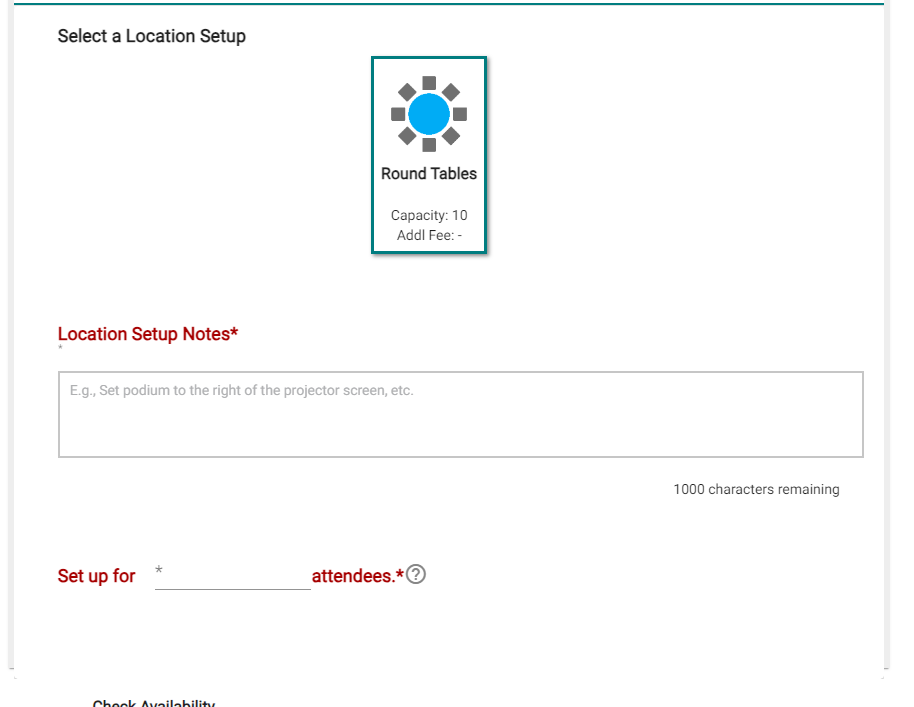
Location setup information is needed for each room that is selected. For rooms that don't allow customization, type "As Is" in the Location Setup Notes field. Also, enter the number of attendees expected for the event in the field provided. Make sure that you select each and every room that you are requesting to book to fill in these details.
Below the room selection box, you will see an area to enter setup and breakdown times. Please enter the amount of time in minutes you think you’ll need to set up and break down your event.
WHEN YOU ARE FINISHED: Click the “Submit” button. You will receive an e-mail verification that your event has been submitted.
To view your events after submission, please click the Events List link on the left after hovering over the sidebar on the left. You may have to click the down arrow next to the Events label to see the Events List option.

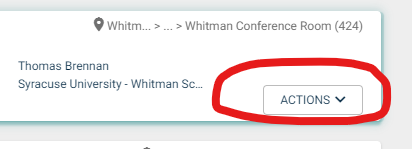
If you wish to make changes to the event, find the event from the Events List and then click the Actions button on the right of the event row. This will display a menu. Click the Edit Event option. Editing an event will make it pending again and will require additional approvals. You will only be able to change events that you are the owner of.
To view all events, navigate to https://calendar.whitman.syr.edu or through the Whitman website at https://whitman.syracuse.edu/events.